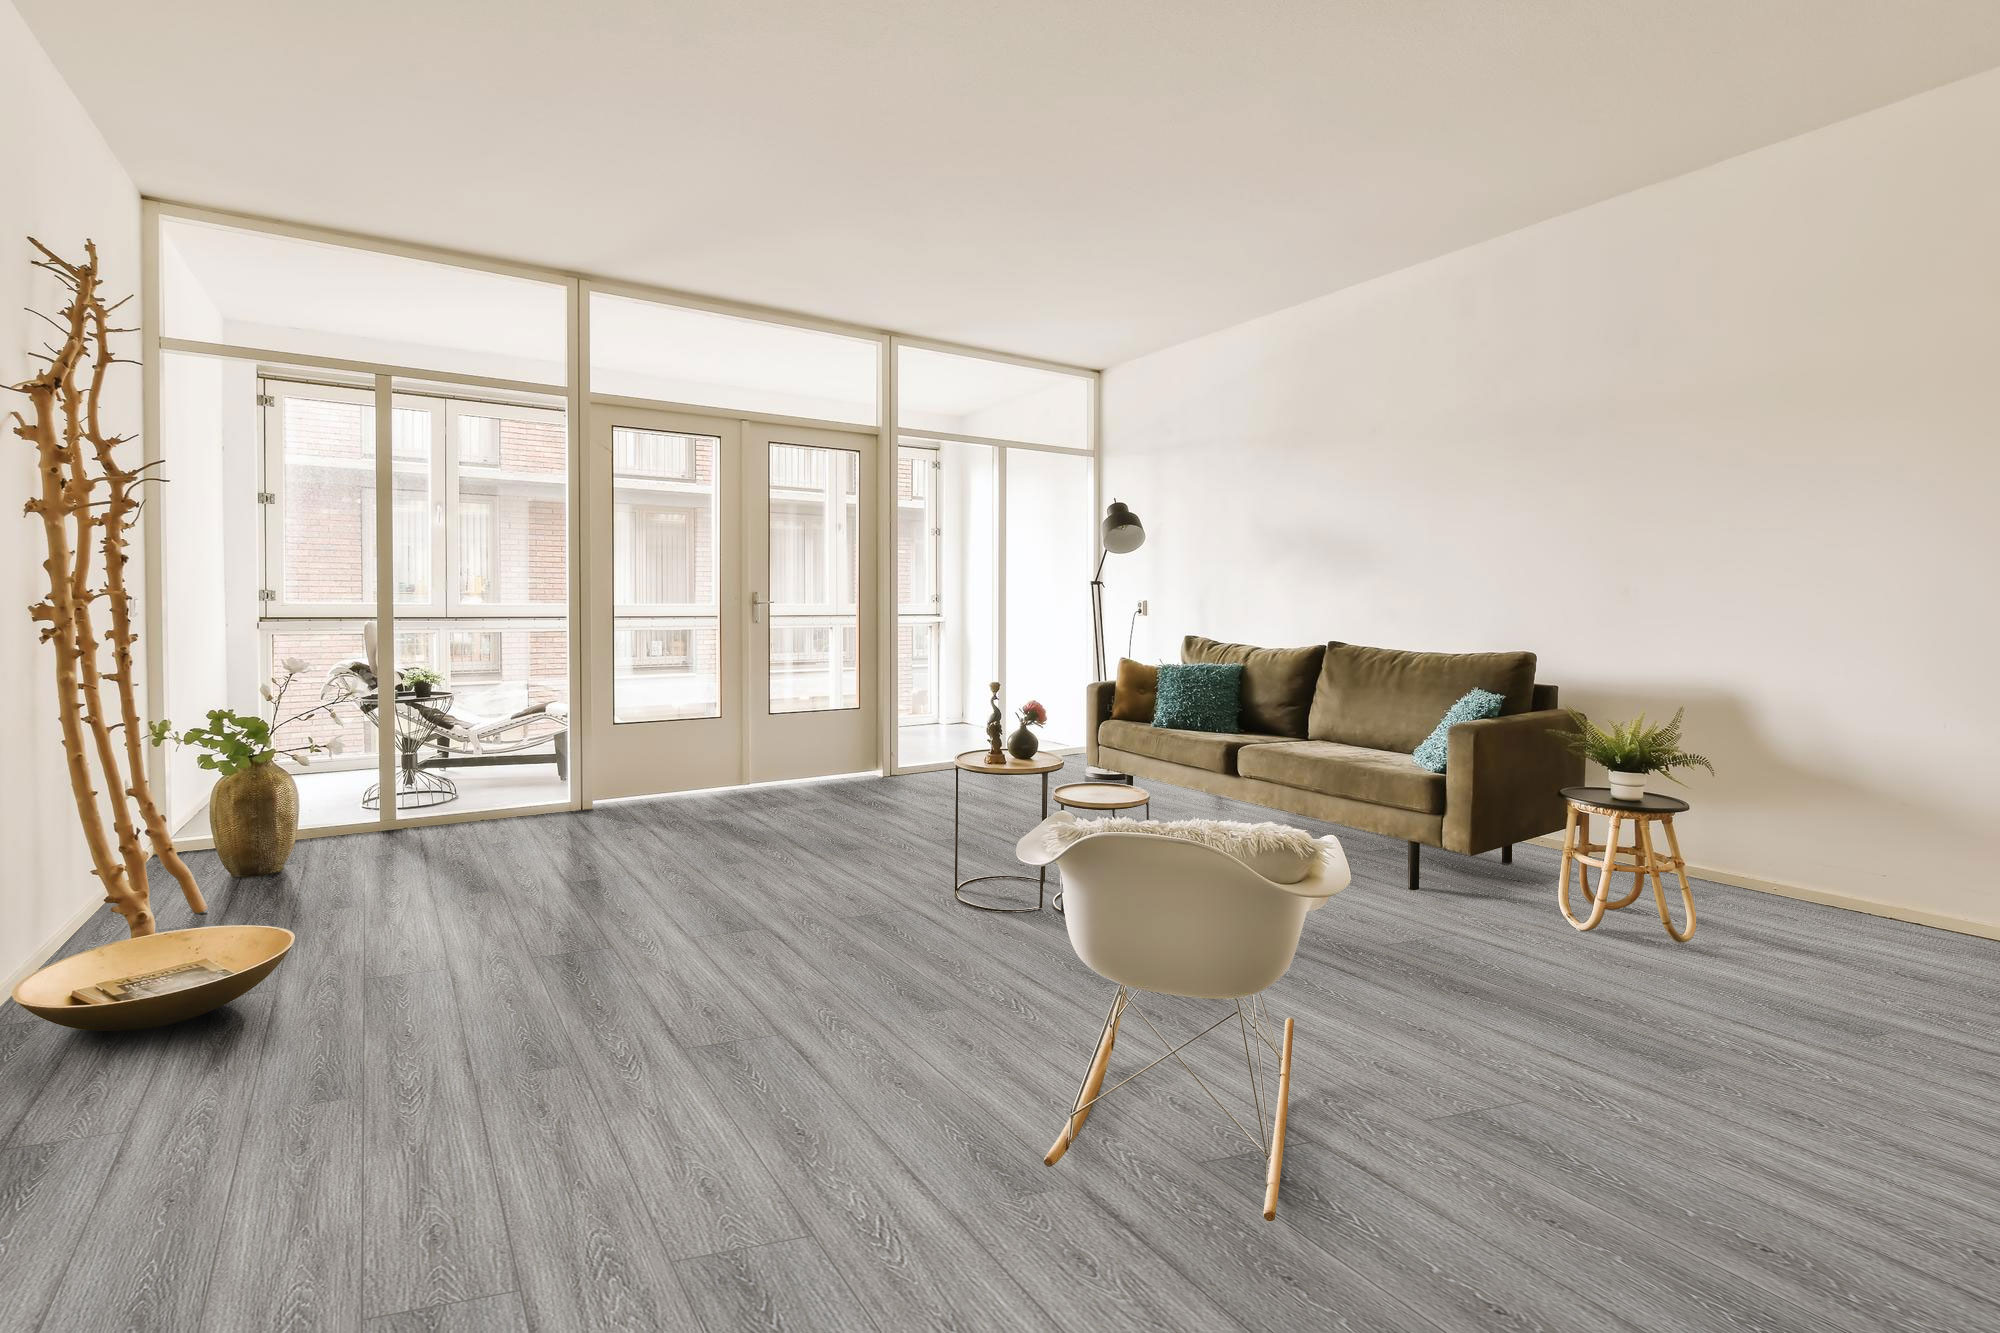
How to Make Brick-Look Tiles Work for Interiors

[60x60] M114-4

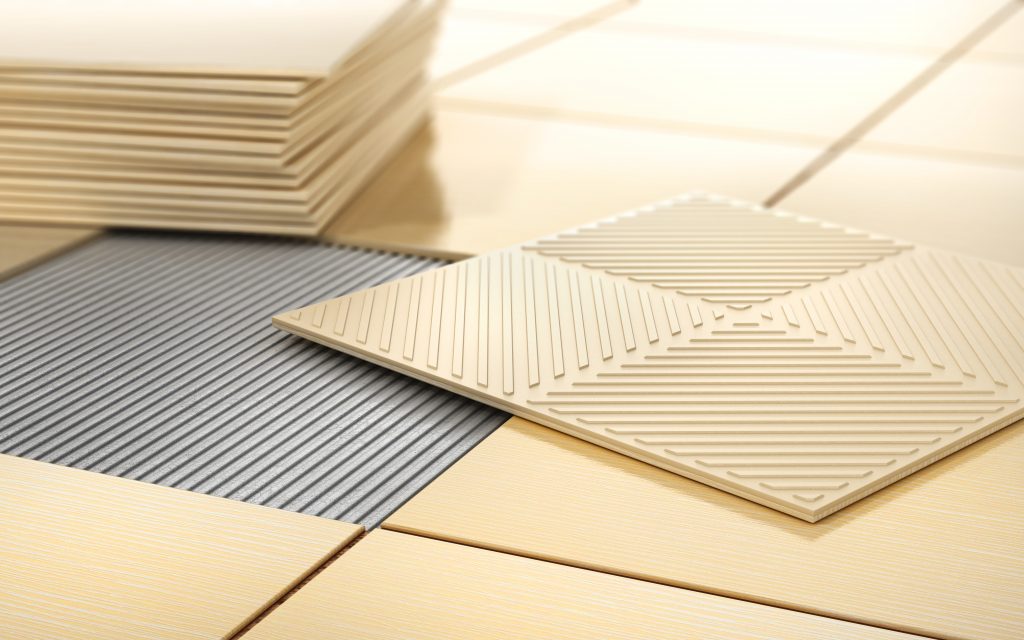
Creative looks can be achieved by using brick-look tiles. These tiles can be used for kitchen renovation ideas and more. The natural appeal of brick-look tiles gives your room a distressed, industrial appearance of a New York-style apartment. If you want to create the industrial-chic style to your interiors, brick-tiles can achieve this look with minimal effort. Your living space transforms into something old and new at the same time. Here’s how you can use brick-look tiles for your interiors.


Why You Should Use Brick-Look Tiles

Brick-look tiles allow you to create an exposed wall look without the mess. Bare bricks add the character and texture you need to elevate the look of your home. It’s a great way to create the urban fusion or rustic look to your home on an affordable budget. Porcelain or ceramic brick-look tiles wear well and are very easy to install. These tiles can be installed on fresh walls or pre-existing tiles. You can easily charm the naked eye into thinking that you’re using authentic brick tiles.


Mixed Media

Mixed media consists of using two textures to create a unified look. This can be applied all over your home but remember to do this sparingly. This creates an inviting and cozy look to any part of your home. Brick-look tiles are great for the mixed media look.

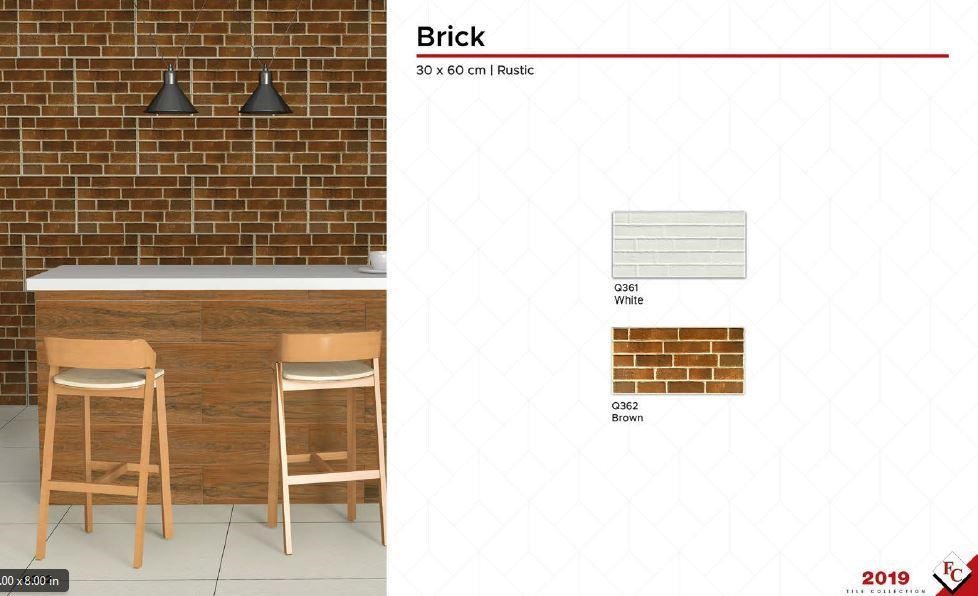
To apply the brick-look tiles, concentrate the texture mostly on the top portion of the wall. Below, you can place a plain tile. It can be glossy or matte depending on your desired result. Compliment the brick-look tile with sleek lighting with metallic finishes to complete the look.


Urban White
floor2

30×60 Brick

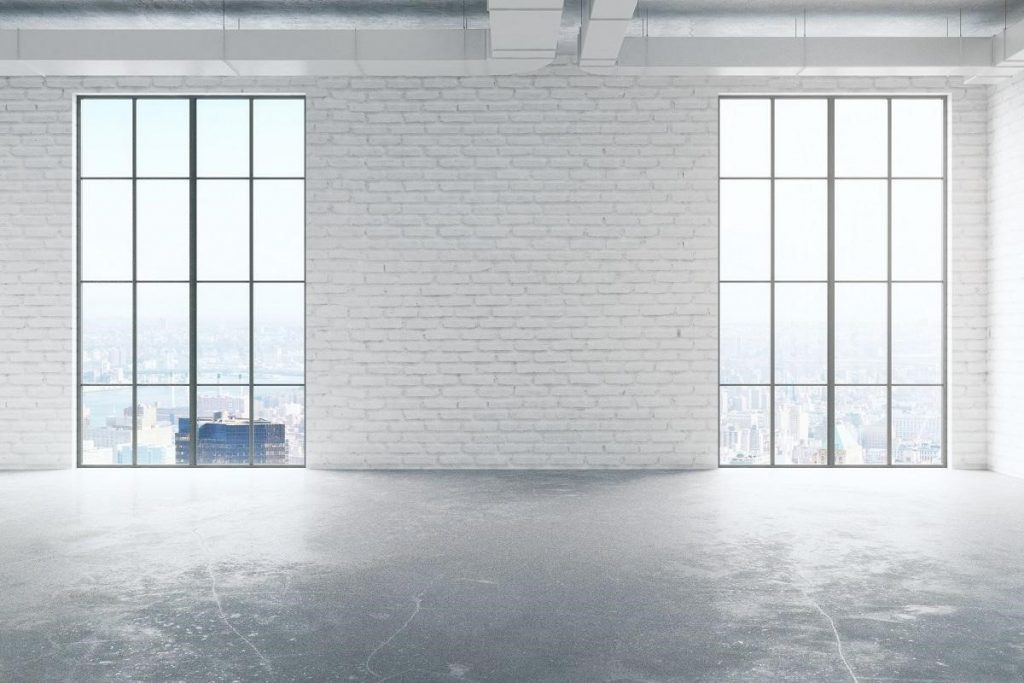
If you’re more interested in a monochromatic design, choose a brick-look tile with a light tone. You can use warm off-white or cool white brick-look tiles. This can be used in the dining area or foyer of your home. If you’re interested in adding a more rugged look, you can combine the brick-look tiles with metal accents and wood paneling. Metal accents can come from furniture or lighting while wood paneling adds a sense of authenticity. The white brick-look tiles can look harsh, but you can tone it down with warm lighting. Live plants can also bring life to the room as well as character.
floor3

White (Q361) is a white monochromatic tile you can use from Floor Center. The 30×60 brick-look tile can be used to create an urban industrial look. Create a high-fashion definition to your room with this brick-look tile.


Seamless Blend

Renovate your kitchen and create a seamless blend with brick-look tiles. The distinct pattern of brick won’t overwhelm the look of your kitchen when you adopt techniques to create a harmonious design. Create soft weathering with a brick-look backsplash that can make your kitchen wall a work of art. Pair it with copper kitchenware to add warmth and floating shelves for extra space. You can create an open look to your kitchen by using these techniques.


Rustic Surprise
floor c 1

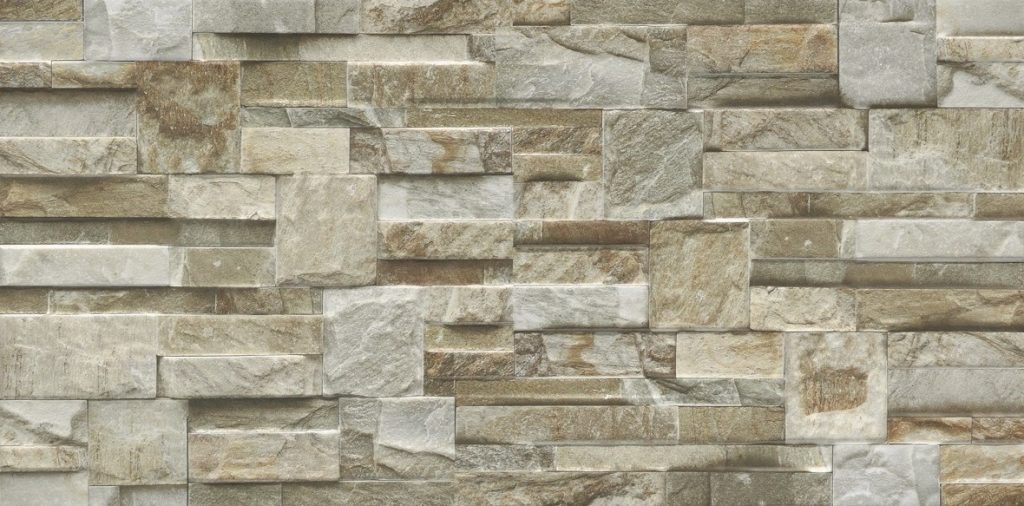
30×60 S364

Subtle gray flooring can be paired with the 30×60 S364 wall tile. This can be used as a backsplash for your outdoor area or it can be used to create a faux-pillar with one of your walls. This tile creates a tranquil, earthy look that any space can benefit from. Cut the uniformity of your room with the faux-pillar to add interest and old-world warmth.


Playful Contrast
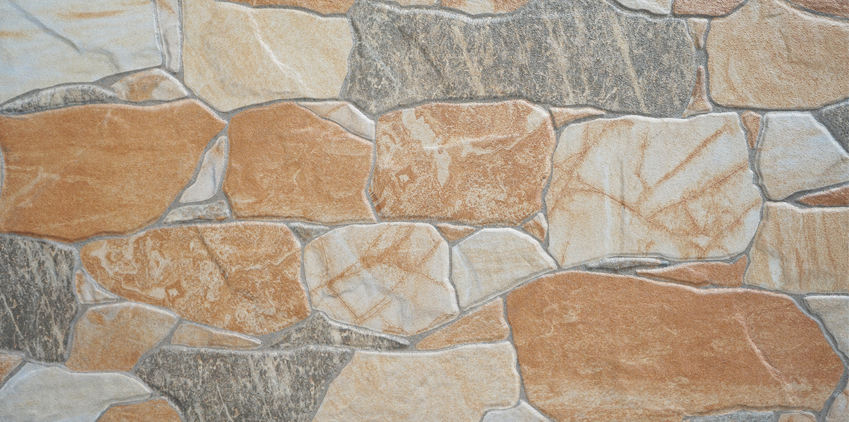
floor c 2

30×60 I-3608

Multicolored brick-look tiles can add a playful contrast to any space. Monochromatic looks can get too repetitive, but using multicolored brick-look tiles can break that repetition. Create a cozy kitchen or living room with complementary hues of neutral. The clashes of color draw the eyes to the area while still keeping everything cohesive and put together.


Key Takeaway

Brick-look tiles are the quickest way you can achieve the industrial look to your home on a budget. Brick-look tiles are easy to install and incorporate in any room of your home. Play with monochrome tiles or multicolored tiles to achieve any look you desire. Break the repetitiveness of your interiors by using brick-look tiles to create the home you’ve always dreamed of.

Replace your dull tiles with the high-fashion look of brick-look tiles from Floor Center. Floor Center’s tiles are made from high-quality ceramic and porcelain so you can be assured that each tile you buy will last.

Qualities of Good Sanitary Ware

shutterstock_589566563

What are the qualities of good sanitary ware?

  1. Ease of Use
  2. Finish
  3. Durability
  4. Efficiency


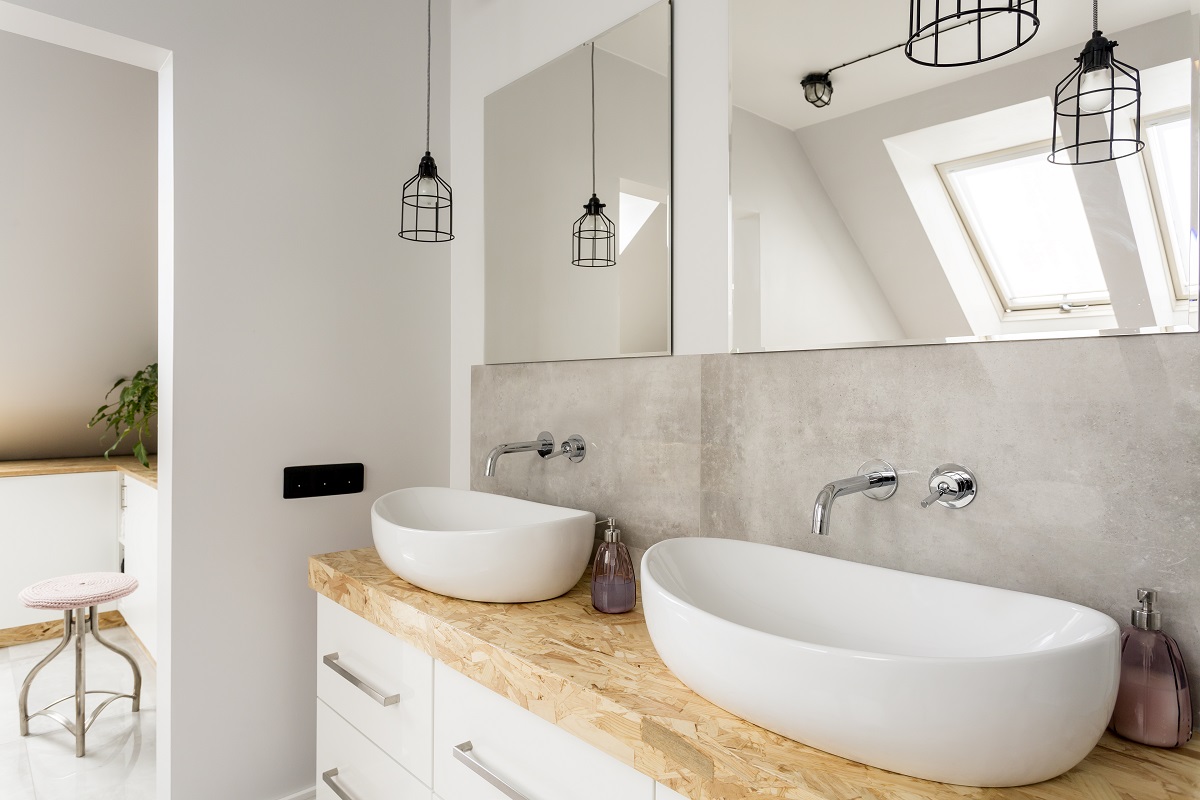
What are sanitary wares and how do you know if they’re good quality? If you look at your bathroom right now, these include toilets, washbasins, pedestals, bidets, urinals, sinks, and bathtubs. Other accessories in your bathroom can also be considered as sanitary ware. There are distinct characteristics you need to look out for to make sure that they are of the best quality. With that being said, here are the qualities of good sanitary ware that you need to keep in mind:


Ease of Use

If there’s no need for you to purchase a complicated system, you can avoid doing so. Remember that the simpler the installation, the easier it is to use. When you approach a supplier, make sure to ask questions in case they have tips for installation and usage.

Complicated mechanisms are difficult to install. If you hire inexperienced contractors, they could potentially damage your newly purchased fixtures. Most modern-day sanitary ware is made with astoundingly durable ceramics to ensure longevity. Save some money and opt for a simple system instead.


Finish

sdfsdfv

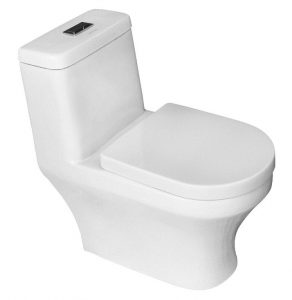
Western Sanitaryware Toilet-2109

Aside from the fact that colors can also affect the overall style of your bathroom, it’s crucial to choose sanitary ware with a pristine finish. Ask for a fresh stock when purchasing sanitary ware. Before making the final purchase, inspect the unit and watch out for dull spots or pinholes. These can potentially grow into bigger problems if you let these slide.

Always look for sanitary ware with a smooth surface and a good finish. Treat sanitary ware as an investment. The 2109 one-piece siphonic toilet features a self-cleaning glaze, water-saving technology, tornado flushing, and soft closing cover. This siphonic toilet from Western Sanitary Ware is a great investment for any home. You wouldn’t want to purchase sanitary ware with poor performance and you should always invest in quality products.


Durability

gergerge

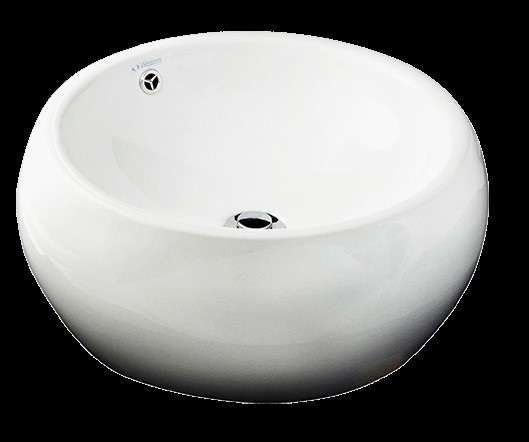
Western Sanitaryware-9011

When sanitary ware is properly made, it’s less prone to chipping. Poorly made sanitary ware uses subpar techniques and ceramics. Be sure to check if the item has an ISO certified label. This is an indicator that the product passes the highest industry standards.

This product from Western Sanitary Ware is an environmentally friendly ceramic basin that uses a self-cleaning glaze. The robust structure of the 8120 basin ensures that the product is durable and dependable even in its later years of use.

It’s much better if your sanitary ware can withstand a minimum of 400 kg. in terms of load. This ensures that your toilet bowls and basins have a dependable build. It also means that they have the capacity to remain durable when used. Finally, make sure that there are no sharp edges on your sanitary ware and that everything fits well.

If possible, look at reviews online. If you can’t find specific product reviews, try looking for brand reviews. You can get a foresight of what you’re receiving when having other sources for opinions. Some brands can have great reviews but as a brand itself, they could present bad customer service. It can be difficult to return faulty parts after sales if the brand doesn’t offer good services.

As mentioned earlier, one brand you can try is Western Sanitary Ware. Western Sanitary Ware is an established brand you can trust. These products are made with high-quality self-cleaning ceramics. The ceramics are durable and will last a long time. Western Sanitary Ware can be used for home or commercial establishments.

As much as possible, take advantage of warranties to prolong the lifespan of your sanitary ware. Brands and suppliers would often highlight warranties as a bonus when purchasing products. It’s good practice to make use of the warranty in case you have faulty parts and components that need replacement.


Efficiency

In this day and age, it’s very important to conserve our natural resources. Improper usage can negatively impact the environment. Some sanitary ware is equipped with the ability to conserve water. One example would be your toilet. Choose a toilet with a flush system that conserves water. Not only is this efficient but you’re also helping the environment.

Another aspect of water efficiency is that your sanitary ware should only absorb 0.5% of water. Porous surfaces tend to absorb more water. Imagine your washbasin or toilet absorbing more than 0.5% of water, your sanitary ware will deteriorate faster since the water can damage it from within.


Key Takeaway

Good sanitary ware should always be reliable. The design needs to be well-made and chip-resistant. Good glossy finishes are also easy to clean. If you’re having difficulties looking for the right sanitary ware, check out Floor Center. Floor Center carries the excellence that comes with the brand Western Sanitary Ware at various branches nationwide. Floor Center is not just a supplier of first-rate tiles but also high-quality sanitary ware. There are tons of designs and finishes you can choose, all with the same durability and quality that you can trust.

World Architecture Day 2019: The Role Architects Play in Our Society

World Architecture Day 2019 The Importance of Architects

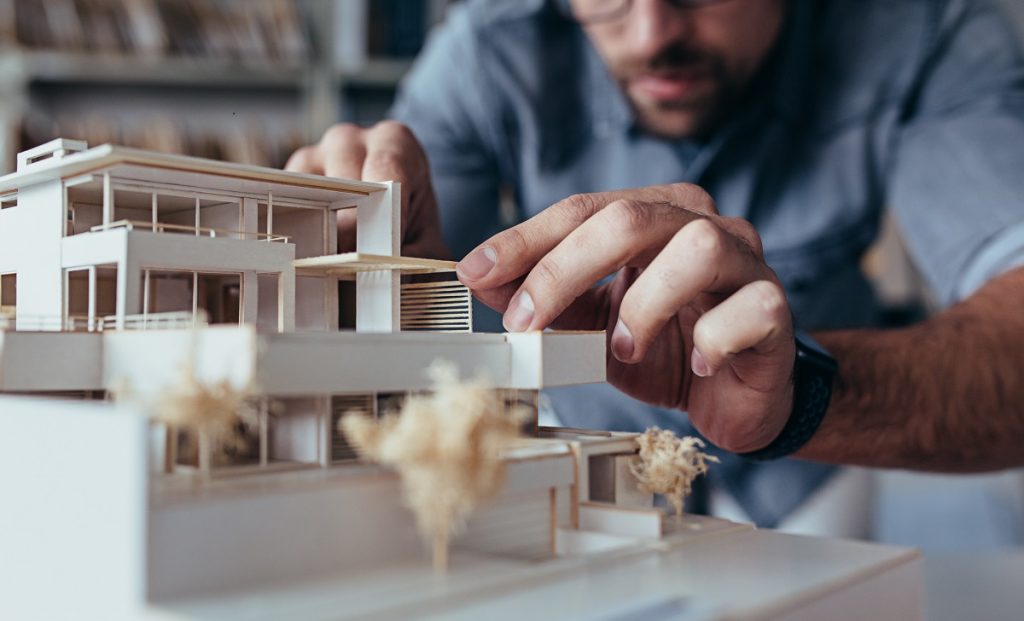
On the surface, architecture is important to society because it’s the foundation of the physical environment we live in. It is a fundamental element of civilization at a given point in time. Architecture as art provides an outlet for a large scale of self-expression. As a science, it answers the needs of society which makes use of technology to create a design.


World Architecture Day 2019

Architecture is exceptional. Many architects in the Philippines work hard every day to create the infrastructures you see. To appreciate architects, the Union International des Architects (UIA) created the ‘World Architecture Day’ in 1986. World Architecture Day is celebrated on the first Monday of October. This day aims to highlight and emphasize the importance of architecture. Architecture created a collective responsibility in designing the world’s societies and settlements.

Architecture has the potential to shape everyday lives. This is done through the hard work of many architects in this field. For World Architecture Day, a specific theme is chosen every year. This draws the attention of various professionals and the general public about certain issues concerning housing and cities. This day is a day of appreciation for the works of architects. It’s also a day to celebrate amazing designs and works from across the globe.

The theme for this year is “Architecture…housing for all”. The aim of this year’s theme is to bring awareness to the challenges of urban living. Proper architecture can change the way many highly urbanized cities function. Today, many architects face the challenge of designing buildings that can fit and work in urban spaces. The overgrowth of the world’s population and traffic is a challenge for many. Architects now must be aware of the effects their designs can do. The right design can impact a city in positive ways while the wrong one can do the exact opposite.


Way of Life

Way of Life

Good architecture can enhance the way of life. Great buildings can easily enhance productivity and boost revenue. Great architecture design goes beyond aesthetics and can drive economic flow. For example, when you’re designing a building for business, you need to note several things. It’s important to determine the building location, business goal, and potential traffic. Can it handle unexpected traffic and is the design safe?

It’s important for an architect to be able to birth a design that’s safe, smart and aesthetically pleasing. An architect has the ability to transform a small space into something outstanding and pulsing with life. One downtrodden building can get another chance with the right plan and architect, thereby giving it a significant economic boost.


Design

Aesthetics and physical appearance apply to buildings as well. Simple designs can be impactful but it can be monotonous and constricting. There’s no point of interest and there’s a lack of outstanding traits. The architect’s job is to add art, creativity, and design to everyday buildings in unexpected ways. You can rely on architects to find ways to make a mundane space into something spectacular.


Balance

Balance

Balance is an important aspect of any design. Without balance, a structure or portrait can look odd. Designing a building isn’t easy. Architects are the people you should approach in order to create a design with balance. They can make sure that the flow of the building makes sense. This ensures that the design is easy to navigate. If the hospital is designed properly, patients can be treated quicker. Well-designed schools encourage a productive learning environment.


Innovation

Architects for centuries have paved the way to progress for society. Our current surroundings are created from years of study and history to create the modern structures of today. Without architects, society would be stuck with primitive structures and techniques that will not withstand the world and society’s current requirements. Structures would be weak against the elements. Basics like infrastructure wouldn’t even exist. People would still be walking on rough ground or crude flooring without these innovations.


World Architecture Day and Floor Center

Floor Center celebrates architecture and architects by providing high-quality, sustainable, products that can be used for various projects. Floor Center is a reliable provider of various tiles and sanitary wares that can complete any commercial and domestic build.

Architects only trust quality brands and Floor Center has been a leading supplier since 1997. This leading industry benchmark makes sure that all professionals and amateurs have the right tools and supplies to create superb results, thus exceeding expectations. Celebrate World Architecture Day by heading over to your nearest Floor Center branch.

How to Tile Over Your Existing Wall Tiles

shutterstock_541755955

How do you tile over existing wall tiles?

  1. Inspect Your Existing Tiles
  2. Choose the Right Tile
  3. Prepare the Wall
  4. Pick Your Adhesive
  5. Begin Installation


When it comes to price, tiling over existing tiles is more affordable than retiling the entire wall or floor. If you don’t have a lot of time on your hands, this can be a great time-saver. You can finish your tiling work faster without having to deal with a large mess. If you want to save money, tiling over existing tiles is also a cost-effective option. There’s no need to hire extra pairs of hands to complete your retiling work. You can consider this as an easy do-it-yourself project. Here’s how you can tile over your existing wall tiles.


Inspect Your Existing Tiles

Inspecting your current tile setup is important. You have to make sure that they’re adhering well to the current substrate. It’s easy to tell when the tiles are successfully installed, make sure that your tiles don’t produce any hollow or drum-like sounds when you tap them. You can check for the sound by tapping each tile with the back of a screwdriver and listen for the hollow sound. If you find that the area sounds solid, you can proceed to tile over it. Tiles that sound hollow have to be replaced before tiling. If your existing surface is uneven, tiling over it will be uneven as well. So it is critical that you make sure that the surface is even before proceeding with your tiling job.


Choose the Right Tile

kyseriesfctile

Current wall tiles can make a huge impact on your project. If the wall tiles you’ve used previously are flat, you can use any tile you want. It’s much easier to install everything on a flat surface. However, you may face some difficulties when the tile pattern is uneven. Tiles with a wave pattern or layers can be difficult to install over. It doesn’t matter if your substrate is even, you will need to adjust according to the design of the pre-existing tile.

Take a straight edge tool. You need this to check how the wall tiles undulate. Use this as a reference when choosing your tiles. If they appear to be too uneven, use small tiles to accommodate the uneven tile surface.

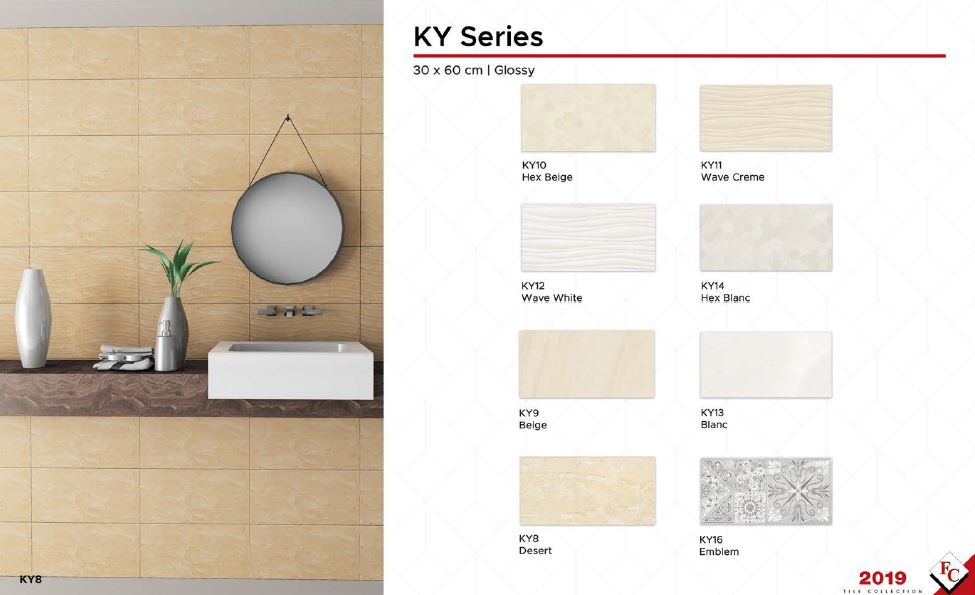
One tile design you can try for your wall tiles is from Floor Center’s 30X60 KY collection. Hex Beige (KY10) and Hex Blanc (KY14) are glossy tiles that are the ideal fit for your bathroom. The light colors reflect your ambient lighting perfectly. The gloss texture allows for easy cleaning.

The Palette collection simulates stone tiles. Enjoy the earth tones of Creme (I-3602) and Beige (I-3603). These 30×60 rustic tiles are perfect for the outdoors. Replace your garden or patio wall tiles with these neutral choices.


Prepare the Wall

Prepare your pre-existing wall by cleaning it thoroughly. Clean the tiles with alcohol and a clean rag because this can remove the dirt and grime without adding excess moisture on the surface. Alcohol will also remove any sticky residue from shampoo and soap. Keep your area well ventilated when you’re using alcohol to clean the surface.

For the pre-existing grout, try removing as much as you can. Grout joints can grow mold spores. If these joints stay warm and humid, spores will begin to grow no matter what you place over it. Removing your pre-existing grout won’t affect the tiles you will lay over it.


Pick Your Adhesive

shutterstock_310563185

Once you find the tile design you want and properly laid out your joints, you will need to choose the appropriate adhesive. The adhesive doesn’t require special properties like waterproofing and weatherproofing. If you install your tiles properly, you won’t run into moisture problems.


Begin Installation

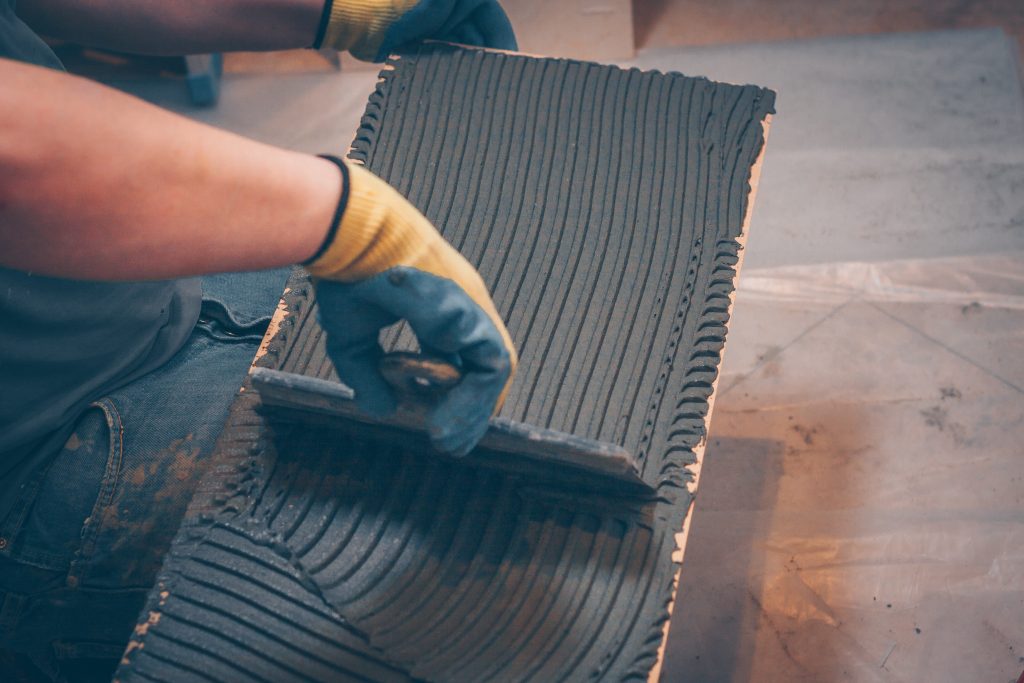
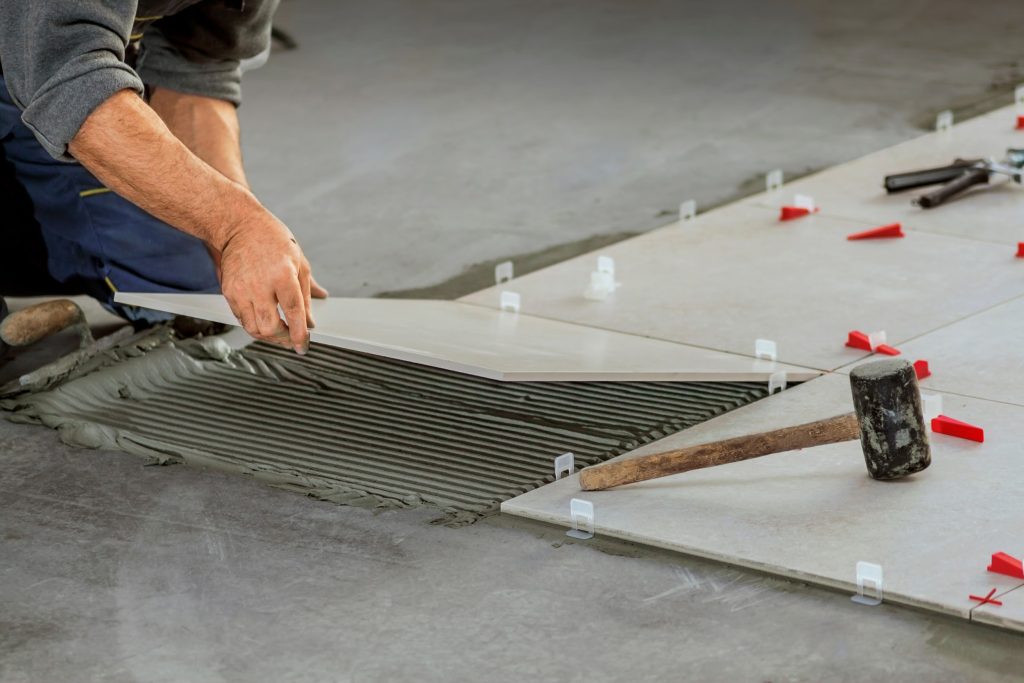
Lay down the adhesive with a trowel evenly on the surface. Begin at the center and work your way out as you lay the tiles. Remember to be careful and avoid sliding the tiles around as you lay them down. Wait for the tiles to fully set before adding your grout.

Mix your grout according to the instructions. If you’ve made the proper spacing between your tiles, this should be easy. Evenly spread the grout and make sure there’s an adequate amount in between each space. Wipe off the excess with a rag and wait for it to dry. Once it’s dry, you should notice a film on the surface. Clean off the remaining residue with grout solution or water.


Key Takeaway

Save some extra cash by installing new tiles over pre-existing tiles. You can achieve an updated look by using this method. To make sure that your project is clean, follow the steps above. For other impeccable wall tile designs, visit Floor Center to learn more!

What Are Aluminum Composite Panels?

shutterstock_757423987

What are aluminum composite panels?

  1. An All-Around Construction Material
  2. For Exterior Cladding Systems
  3. Affordable
  4. Highly Functional


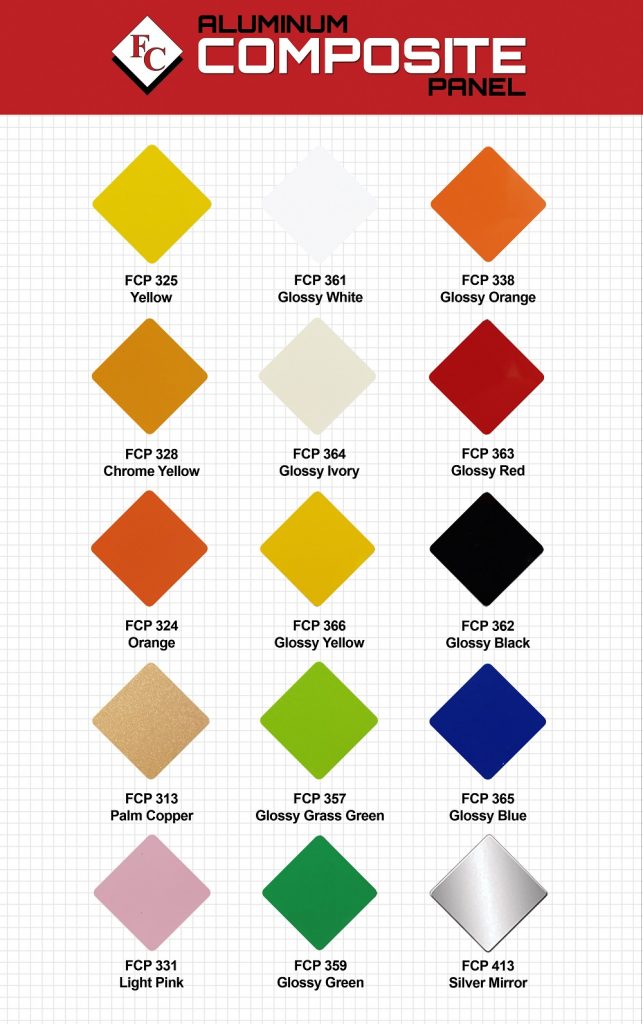
Good materials can determine the outcome of your project. Aluminum composite panels can essentially serve as a solution to the problems that you may face when using materials like concrete, steel, brick, and wood. You can typically find aluminum panels being used in various city skylines. Combined with the right price and tiles in the Philippines, you can reduce the overall cost of your construction project. Read more to learn more about aluminum composite panels and what they can offer.


An All-Around Construction Material

shutterstock_355192829

Aluminum composite panels are two aluminum sheets with a thermoplastic core which uses polyethylene. The core holds the two aluminum panels together. The structure of the aluminum composite panels is great for exterior cladding systems. An exterior cladding system is an exterior wall-covering that protects the interior of your home. Instead of using cladding like wood or vinyl, aluminum is a great choice. Compared to wood or vinyl, it has heat resistant features while also being able to withstand humidity and sunlight.

Aluminum composite panels can also be used for interior design. You can create highly functional and aesthetically pleasing work. The flexibility of the material allows it to do more than any other cladding material. It can be bent, cut, and shaped to the design you desire. The panels, when properly cared for, can also last up to 30 years.

Compare aluminum composite panels with other cladding materials, and you’ll immediately notice the weight difference. If you compare it to steel, aluminum is significantly lighter. It’s one of the lightest materials you can use for cladding.


For Exterior Cladding Systems

ACP pg1

Since cladding is for the exterior of the building, aluminum composite panels can also be attached to the building’s framework. The panels can also be used as an intermediate layer for spacers. It’s used to protect the building from wind and rain. Protecting your home from these elements can help preserve the structure. Exterior cladding can also provide sound and thermal insulation.

When using this material, the reduced weight introduces a budget-friendly cladding option. Labor costs and materials costs are lower because it lacks fixation points. The ease of use keeps the overall cost of this material very low.


Affordable

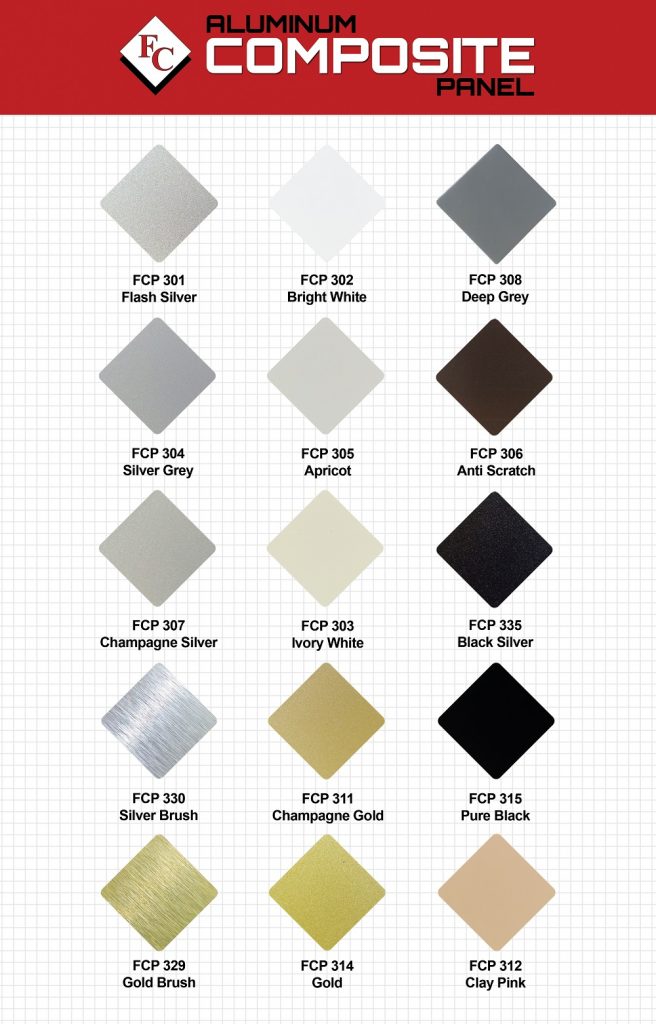
Aluminum composite panels can be cut and shaped into various sizes and designs. These panels can be colored with a variety of different tone and imitate other material textures such as wood. Even if the aluminum composite panel is light, it still has a naturally durable structure. You don’t have to worry about rooting, rusting, and corrosion since the layer of aluminum oxide protects the material from this.

Each aluminum composite panel undergoes a process called anodization. Anodization increases the panel’s thickness. This is an electrochemical process that turns the metal’s surface into a durable and corrosion-resistant finish. In the end, you have a durable product that’s used by a multitude of industries.

Aluminum is known to resist moisture and sunlight. The panel’s anodized layer protects it from dirt. Maintenance of this material is easy. There isn’t a need for daily cleaning and when you do, it’s not as time-consuming.


Highly Functional

ACP pg3

Other functions of aluminum composite panels include partitioning, false ceilings, signage, and interior design. For partitioning, aluminum composite panels are perfect because they’re very simple to use. These panels can easily be adjusted by removing rivets and screws, allowing you to customize them anytime you want.

False ceilings are not only aesthetically pleasing but also offer a degree of temperature control. The polyethylene core acts as a temperature-regulating agent for the heat. The aluminum makes it durable and you can create a temperature regulating false ceiling that will last for years.

The flexibility of the aluminum composite panels allows for various durable signage to be created. Having signage situated outside immediately exposes it to harmful elements, but the extra durability and heat resistance of the panels can be used to your advantage.

Since this material is very easy to cut, creating unique interior design pieces requires minimal effort. Depending on the type of aluminum composite panel you use, there’s potential in creating a multitude of interior furniture and decor with the material. You can create an elegant piece with all the benefits offered by aluminum composite panels.

The aluminum composite material is also highly resistant to flame. It can resist temperatures as high as 600-degree Celsius. Make sure to ask your supplier if your aluminum composite panel core is non-combustible.


Key Takeaway

Aluminum composite tiles can protect your home from harmful elements and be used for a variety of different projects. There is a wide selection of different colors and finishes you can choose from with Floor Center’s aluminum composite panels. Try aluminum composite panels for your next projects, whether interior or exterior projects!

How to Use Mosaic Tiles to Elevate Your Home Design

[30x30] WP3303_

How can you install and apply mosaic tiles into your home design?

  1. Prepare
  2. Mark Layout Lines
  3. Begin Installation
  4. Apply Grout
  5. Install A Backsplash


Mosaic tiles can easily make any home design more special. If you’ve been wanting to upgrade your home, this is the perfect weekend or holiday project. Add more style per square inch by creatively using mosaic tiles for any part of your home. If you’re curious about how to install and incorporate mosaic tiles into your home design, here are the steps you need to follow.


How to Install Mosaic Tiles

Visual interest is always recommended if you want to create a well-designed living space. You can use mosaic tiles in any part of your home because they come in a variety of different finishes that can create various intricate effects. It’s an instant visual upgrade you need to try out. Previously, you would have to manually cut and place the mosaic design yourself. Modern mosaic tiles are much easier to install. To install mosaic tiles, you need to do the following:


Prepare

shutterstock_573685309

You need to prepare your materials and the surface. It’s similar to installing ceramic tiles. A good installation surface starts with a smooth surface. If you plan to create an underlay, you can use a cement board which is applied directly over your plywood subfloor. This under-layer is great for surfaces that tend to get damp easily, such as your kitchen area, pool area, and bathroom. Areas that stay dry generally don’t require an under-layer. Skip this step if you’re installing your tile elsewhere.


Mark Layout Lines

Test-fitting your tiles should be done before installation. After test fitting, you can prepare your layout lines. The most effective method is the quarter method. Divide the space into four quarters. Use a tape measure to mark the midpoint of the wall or floor. Use chalk to create intersecting lines. You should have a square cross at this point.

Make a point 4 feet from the center of one of your lines. Mark a point 3 feet from the center on the intersecting line. The diagonal line from the two points should have a total measurement of 5 feet and 90 degrees. If your results are different, adjust your lines accordingly until you get the right results.


Begin Installation

shutterstock_1028132779

Once your layout lines are created, use a trowel and thin-set adhesive. Spread the adhesive evenly per quadrant. Apply enough but not too thick that you don’t see the under-layer.

Proceed to apply one sheet of mosaic tile on one corner of the quadrant. When you’re adjusting the tile, you may use your hands but remember to be careful. Make sure that the tiles are set perfectly within the square. Press firmly for several seconds and make sure that you don’t slide the tile when you release your hand.

Continue to install the other tiles in the same manner. Use tile spacers in between each tile to ensure that the spaces are uniform. Work your way outwards until all quadrants are completely covered.


Tile Setting

Tile Setting

Did you know that mosaic tiles can ripple or form waves on the surface? You can avoid this by taking a rubber mallet and a small piece of plywood. Place the plywood on top of the tile and gently tap the mallet to set it in place. Pay extra attention to the seams of each tile. This can prevent uneven surfaces and uneven gaps.


Grout

Grout

The mosaic tiles are now dry and hardened into the thin-set. What do you need to do next? Grout is needed to tie everything together and to seal everything in. Mix your grout according to the instructions. Use a grout float to spread the grout over the tiles evenly. Use the grout float to make multiple passes. This allows the grout to spread over the joints properly.

Continue this process until all the joints are filled in evenly. If there is excess grout, use the grout float to scrape it away. Let the grout harden slightly then wipe the excess with a clean cloth. Use a liquid grout haze remover to remove the remaining grout once it’s fully cured.


Install a Backsplash

Backsplashes are an instant fix to create interest in any part of your home. You can use a backsplash for your patio, foyer, and more. If you’re cutting your mosaic tiles or installing pre-made tiles, you can easily create a backsplash.

[30×30- Mosaic] L233-3

[30x30- Mosaic] L233-4

[30×30- Mosaic] L233-4

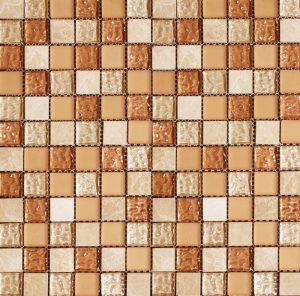
Your patio can transform from simple to glamorous with these mosaic tiles by Floor Center. The earth tones from this set are both warm and neutral. It can easily complement your patio furniture and more. Choose L233-3 and L233-4 30×30 tiles for a unique patio backsplash design.

[30x30- Mosaic] W-02

[30×30- Mosaic] W-02

[30x30- Mosaic] W-04

[30×30- Mosaic] W-04

Add an accent to your foyer with the glossy W-02 and W-04 tiles. All tiles are pleasing to the eye. The grey tones used in this 30×30 set are neutral and can easily brighten up your foyer.


Key Takeaway

Mosaic tiles can instantly transform the look of your home. Enjoy the wide collection of Floor Center for all your ceramic and mosaic tile needs. Floor Center also offers tools that are essential when you’re installing your mosaic tiles. Elevate your home design with mosaic tiles by Floor Center for a fresh look for your home!

How to Incorporate Colorful Tiles into Your Home Design

How to Incorporate Colorful Tiles into Your Home Design

How can you use colorful tiles at home?

  1. Floor Application
  2. Accent Wall Application
  3. Artistic Application
  4. Cleaning Dirty Grout


How can you use colorful tiles at home and how do you clean dirty grout? Dirty grout and colored tiles are not a good combination. You may find that your grout stands out more when you’re using colored tiles. Your attention is immediately drawn to the color and the next thing you’ll see is the dirt. This is very easy to do. You just need to dedicate some time off to be able to plan your new tile flooring and grout cleaning. This process is not an anything-goes situation. You need to prepare so you can properly execute the effect you want. Here’s how you can use colorful tiles at home and how to clean the excess grout for them.


Floor Application

Floor Application

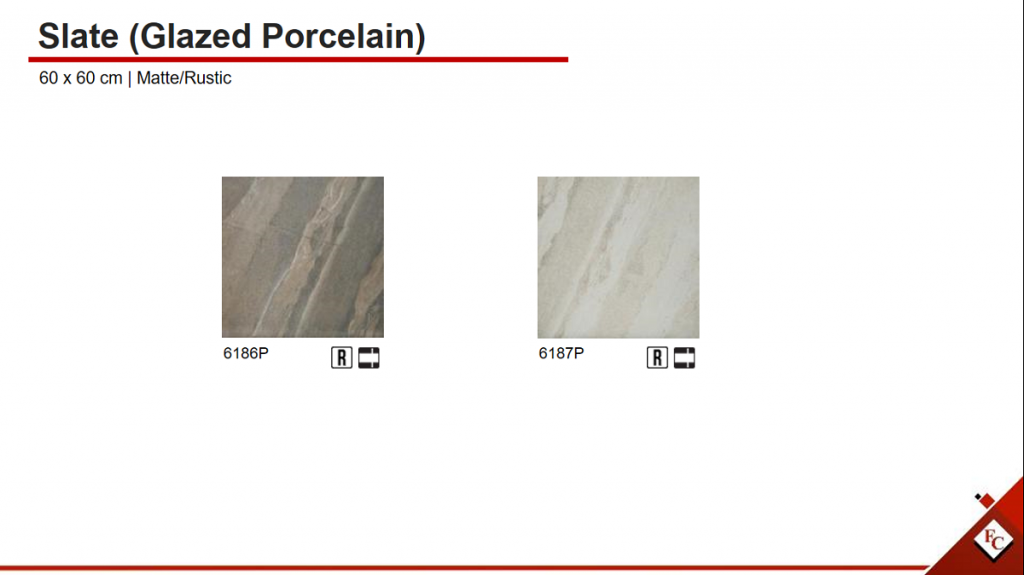
60×60 Slate

Floor application can get a bit complicated. It depends on the design you want to go for. If you go too bright for your tiles, you can end up with a gaudy-looking floor design. You need to find balance. Try using neutral tiles with brights and accents. This can bring the balance you need without sacrificing the pop of color you desire to put. Try out this tile from Floor Center. The 60×60 Lithos collection has a matte/rustic tile called Abstract (ML06-7). It’s a combination of cool tones such as a subdued cerulean and a neutral gray. You can take out the guesswork for your tile designs.

If you’re into natural textures, there’s another tile design from the 60×60 Slate collection that is a rustic tile with a lapis lazuli color and gold veining. It’s an elegant, rustic, marble-like tile that can fit your foyer or kitchen. You can even use it to accent certain areas of your living room. The possibilities are endless when you’re dealing with floor applications for your tiles.


Accent Wall Application

Accent Wall Application

40×40 Strata

Accent wall application isn’t as complicated as floor application. If you have a base already present, which can be neutral or earth tone, you can readily incorporate the pop of color you need to bring your room to life. This is especially great for bathrooms.

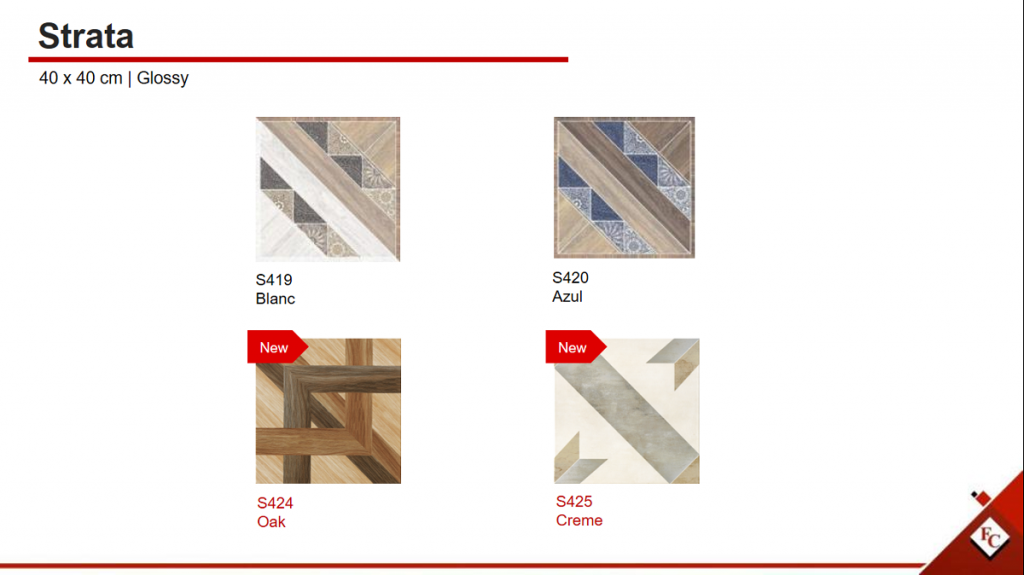
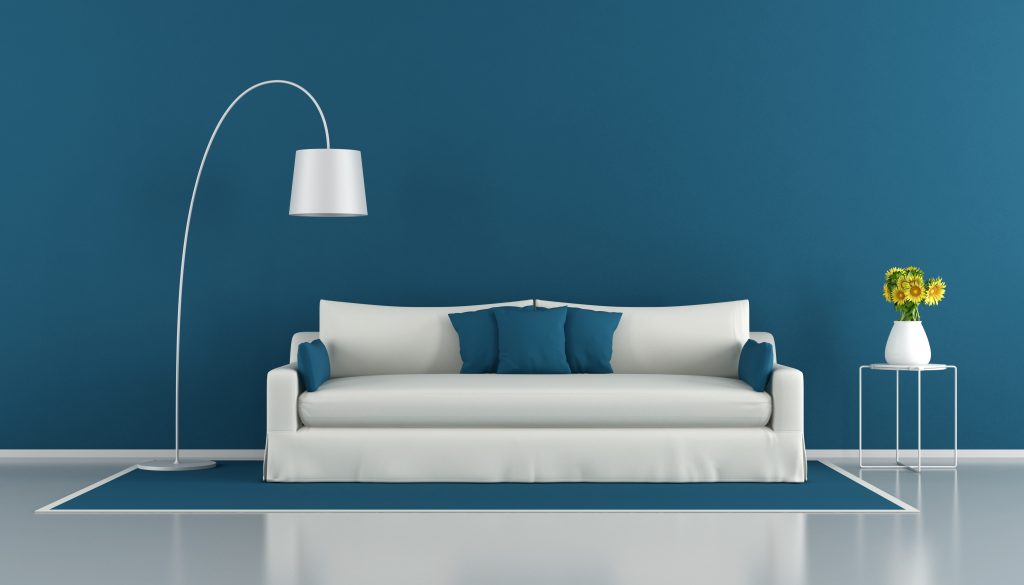
How do you accent a matte tile? You will need to use a contrasting color or pattern. Blues can pop out when paired with a warm or earth tone color. One tile you can use to create your accent wall is from the 40×40 Strata collection. Creme (S425) is a glossy tile with an earthy baby blue tone and geometric pattern. It combines the best of both worlds. It also has the color and pattern you need to create a unique accent wall.

Accent walls are not limited to bathrooms. You may even use it for your swimming pool. If your pool is using the Blanc (01-0) tile of the glossy 30×30 Aura collection, you can pair it with Blue (170T) from the same collection. Then for the floor of your pool, you can use Azul (WP3303) which is a tile from the 30×30 Montage collection.


Artistic Application

Artistic Application

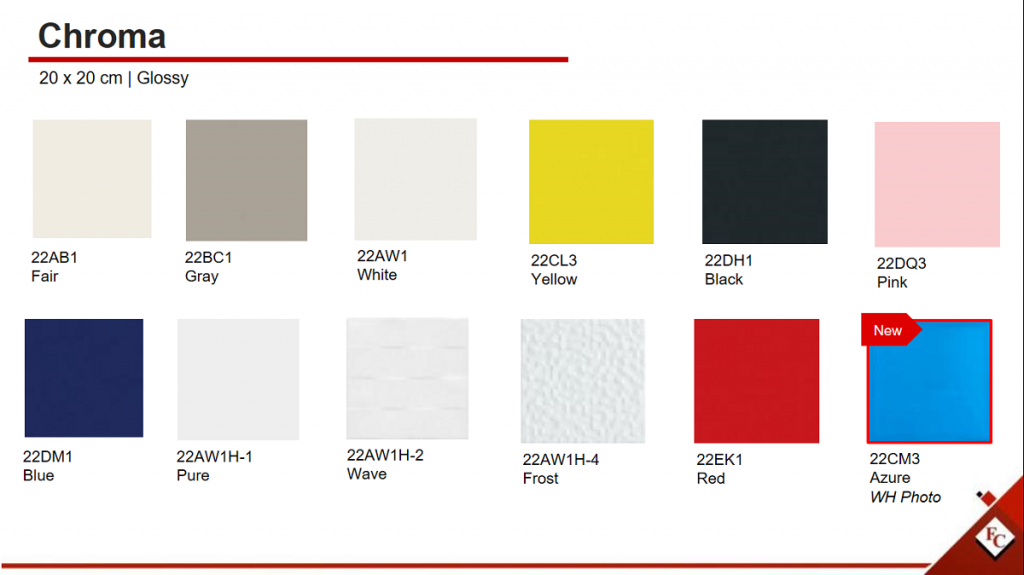
20×20 Chroma

Artistic applications are where you get to be creative but also careful. You can create different patterns for your surfaces and flooring. Take inspiration from the 20×20 Chroma collection by Floor Center.

shutterstock_407296606

This glossy tile collection includes a variety of colors that can help you create unique patterns and symbols for your surfaces, flooring, and more. You can create a pop art surface or flooring that can instantly bring attention to your room.


Cleaning Dirty Grout

shutterstock_64119958

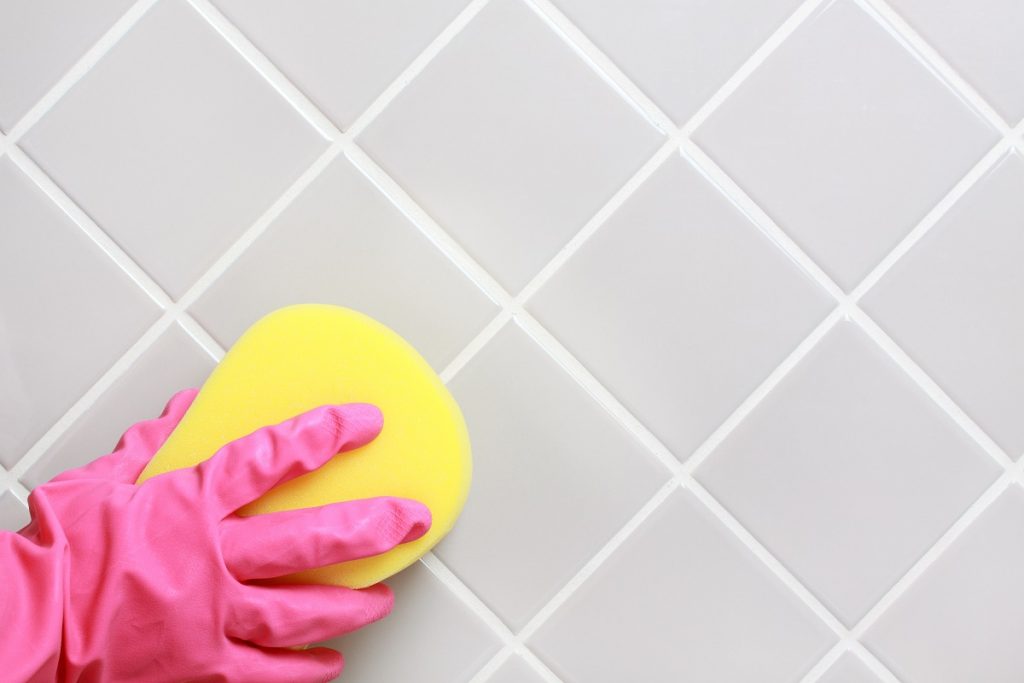
Cleaning dirty grout is easy. Clean grout is the secret to clean-looking tiles for all of your rooms. Porous grout is bound to absorb dirt and spills. It’s important to clean them when you can. To preserve the integrity of the designs and accents you created above, wipe down the grout with hot water and apply a cleaning solution on the grout and leave it on as instructed on the packaging.


Key Takeaway

Good tiles require clean, high-quality grout so the tiles don’t immediately show signs of wear. Cleaning your grout and using high-quality tiles can produce great results. If you’re in need of high-quality materials visit Floor Center. Use Floor Center’s high-quality colored tiles to elevate your home design. Floor Center’s ceramic tiles are nothing short of the most pristine quality. Only use the best tiles for your home design by taking a look at Floor Center’s diverse collection of tiles today!

The Definitive Guide to Marble-Look Tiles

The Definitive Guide to Marble-Look Tiles


What do you need to know about marble tiles?

  1. Judge the quality
  2. Marble-look tiles need to be sealed
  3. Avoiding acids
  4. Slip resistance
  5. Protection from damage


When it comes to the multitude of tile choices available, you don’t need to immediately gravitate to the disadvantages of marble-look flooring. These tiles always give a unique look and a luxurious texture. You do need to know that these tiles require a lot of care and attention so that they can last for a while. If you’re curious, here’s a simple guide to acquiring the most ideal marble tiles and how to properly maintain them.


Judge the Quality

Judge the Quality

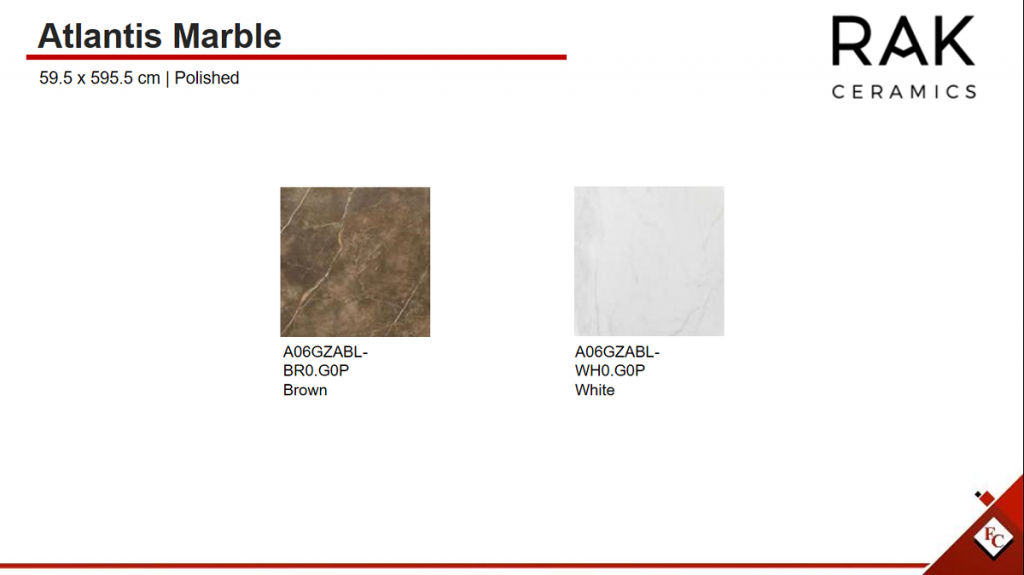
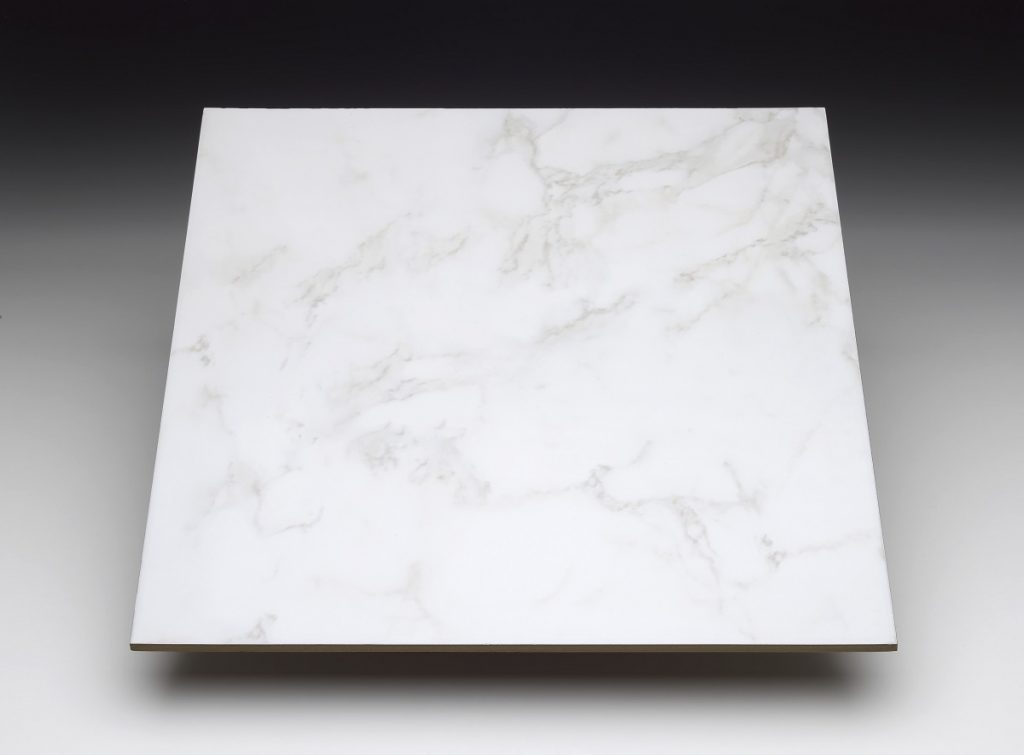
59.5×59.5 Atlantis Marble

You need to assess various parts of your marble tile so you know which one has the best quality. Start by looking at the back of your tile. If you find a mesh or net, this is what supports the tile. This means that your tile is much more prone to scratches or cracking. Marble tiles with this type of support are not suitable for high traffic areas as they can be prone to scratching and etching.

Now you need to flip your tile and look at the front. Angle it at 45 degrees and shine a light on it. If you notice any dull patches your tile may require filler. Avoid marble tiles with tons of dull patches. You may end up scratching off the filler in the future and it can cause unsightly holes in the tile itself.

Notice the veins and fissures in your marble tile, flip it over once more and check if they appear in the same spot. Some tiles are more prone to cracking if the fissure is deep enough. Use this type of tile along walls or low traffic areas. The quality of your marble tiles can be subjective especially if you’re approaching different manufacturers. Look for marble tiles with more stone than fiberglass resin support. Pure materials tend to work better than their fiberglass support counterparts.


Marble Tiles Need to Be Sealed

Marble tiles are natural stone tiles and like other natural materials, they tend to be porous. Pores can make your marble tiles more vulnerable to stains and spills. This can ruin the look and tone of your tile.

Protect your fresh marble tiles by treating them with a below-surface sealer and a surface finishing treatment. These treatments help the marble tiles last longer by sealing and filling the porous material while creating a protective layer on it. You can even apply this after 6-12 months to maintain the protective layer.


Avoid Acids

Avoid Acids

Marble tiles are alkali. Alkali materials clash with acids since their components make them a base. If you’re using a marble floor, it might end up becoming discolored if you accidentally pour acids such as vinegar on the surface. This is due to the chemical reaction between bases and acids. Even fruits, sodas, and soaps can cause an unwanted chemical reaction.

If you happen to spill these on the surface of your marble tile, be sure to wipe it off immediately. Adding the sealants mentioned earlier can help protect your tiles but you still need to avoid accidentally spilling anything remotely acidic on your marble tile.


See If It’s Slip Resistant

Did you know that slip resistance is measured by the coefficient of friction when it comes to floor tiles? If the rating of the coefficient of friction is high, you’ll find that it’s more slip-resistant compared to lower rates. You need to determine the finish of your marble-look tile to know how slip-resistant it is.

Polished tiles tend to cause less friction which can make it prone to slipping. Avoid using polished tiles in your kitchen, bathrooms, and entryways. Now, for a slip-resistant option, marble-look tiles that are honed, tumbled or brushed have a much more slip-resistant surface. Use these tiles for more high-traffic areas.


Protect It from Damage

Protect It from Damage

Marble may seem like your typical stone but it’s actually quite soft compared to other materials. Properly caring for your marble flooring can help avoid damage from chipping and cracking. When you’re installing your marble tiles, make sure that there are no gaps in between the tile adhesive. Gaps cab create air bubbles that can result in weak spots under the floor. Weak spots will eventually lead to cracking.

To avoid scratching the surface of your marble tile, add an extra layer of protection on the foot of your furniture. Install rubber or acrylic pads so you can avoid any scratches on the surface. Regular cleaning can also eliminate any grit and dirt that can eventually cause small scratches on the surface of your marble tile.


Key Takeaway

Purchasing the perfect set of marble-look tiles and making them last can be astoundingly easy if you follow these guidelines. Any type of tile needs some form of maintenance and preparation; marble-look flooring is no exception. Visit the nearest Floor Center to learn more and check out a wide range of world-class marble-look tiles!